Monday 23 December 2019

Realistic DX394 RAM Memory Back Up Battery Replacement


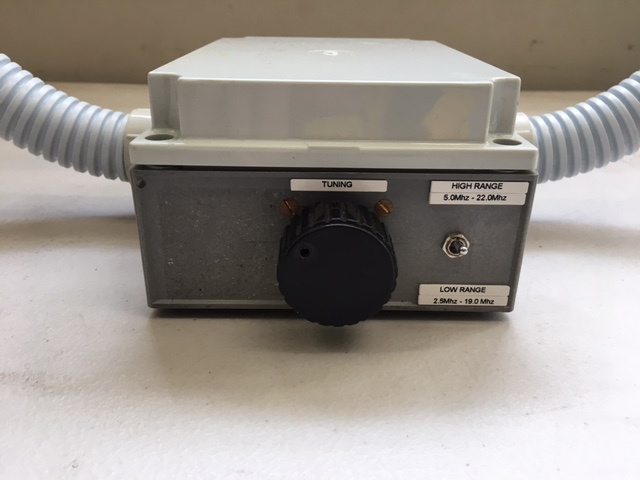
The DX394 has a small rechargeable battery soldered onto a totally inaccessible place in the front of the radio, and when the battery failed on my radio, I was faced with a row of irritating flashing zeros on the clock, a display that reverted to 150khz, and blank memories, each time I returned from a holiday or weekend away and the power to the shack had been shut down. Eventually I put the radio in my cupboard and stopped using it. Then I discovered someone called Dino from the DX394 io group had discovered a possible way of bypassing the very complicated disassembly of the front panel (which requires manufacturing your own tool to remove the tuning knob). It is shown above in my slightly edited photo to aid clarification to complete beginners like myself. 

I was a bit reluctant to take my soldering iron (and craft knife for severing the PCB trace) to my beloved radio, but it didn't look like rocket science and I figured I'd give it a try. 

I have already done a couple of radio mods, easy ones. Like the Uniden 9000XLT discriminator tap and the PRO2005 EL backlight replacement. I'm a rubbish solderer, I have shaky hands, but I'm careful and methodical and down-to-earth about the idea that if I damage the radios beyond repair they are not so expensive they can't be replaced one day. I| might even use the opportunity of their demise to try a different radio. So with this mentality you can't go wrong. 
I am so glad I tried all of these mods and would not hesitate to try them again if the need arose. They are not too hard and really help boost your confidence. 

Firstyl, you have to buy a Panasonic VL2020 battery from ebay (about £8).

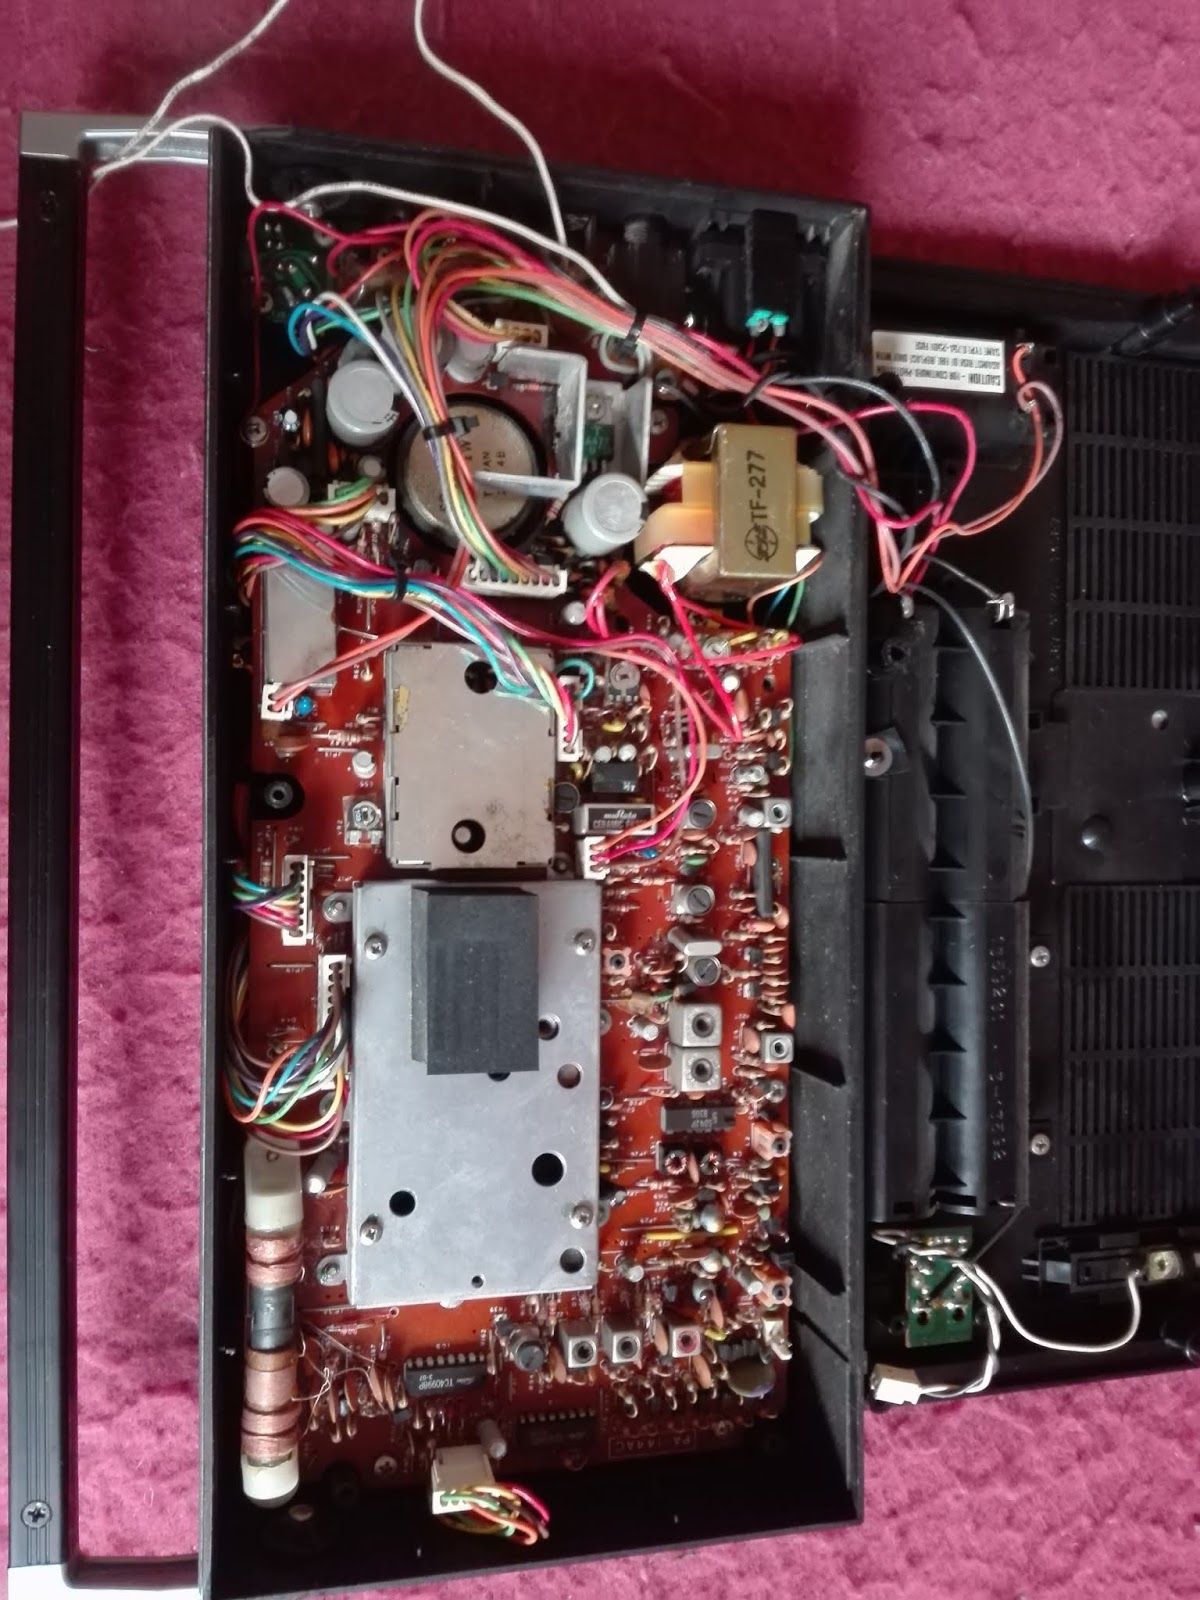
When you have removed the top panel of the DX394 if you look inside at the back of the front panel you will easily find D206 in the diagram.

To sever the trace to its left where shown you need a sharp knife. I practiced a bit on an old, broken radio, to figure out the pressure needed to break the copper. It did need pressure, a steady hand, and using your other hand as a brake in case you slip. But afrer a few firm scroes across the trace and lots of inspections with a jewellers loupe (an ordinary magnifying glass was useless) it was clear when the copper had been cut completely. A useful tip: after each scoring across the trace, I wiped the debris with a small cotton bud dipped in surgical spirit to more easily see the result of the cut.

Soldering a small piece of insulated wire from pin 1 of D206 I firstly tinned the tip of the wire and dipped it in flux before carefully soldering it in place. That would be soldered to the positive terminal of the battery. I did the same thing with the negative lead, soldering it to the big blob of solder shown on the diagram.

The result:


I then put the battery inside a small memory card folder and neatened thing up a bit.

Although the battery read 3V when I inserted it, after just half an hour it had gone down to 2.8V and after a 30min power down, the memories were empty again. So I left the DX394 connected to a 13.8V power supply overnight for two consecutive night, to fully charge the new battery and since then everything is working splendidly.

I can't tell you what a joy it is to have the memory working again. The radio has been reborn. To switch on in the morning and see the right time, no flashing, and my last used frequency, with all the memories intact is indescribable joy! I must be a true radio geek!

Had it not worked, I would have bought another DX394 cheaply and tried again, as I have always loved this radio. The MW and maritime MF bands are incredibly sensitive. HF sensitivity is excellent. The memories are quick and easy to use and program and change and delete. The display is large and pleasing to look at.
Sadly AM broadcast listening is fatiguing. Most people agree here. But I use a DX400 for broadcast stuff nowadays, and with its excellent murata filters and audio quality use the 394 for aero/utility monitoring, MW and maritime MF.

I'm a big aero fan, and always monitor Stockholm radio and Shanwick. The DX394 is perfect for this.

Anyway, message me if you need an advice via the comments or QRZ (M6RDP). I just wanted to show you this excellent mod here on my blog.

Bye. 73


Saturday 22 June 2019

Kenya Airways Ops LDOC Frequency 13330khz Nairobi


I was beginning to think that the only aircraft ops I could hear these days on short wave was via Stockholm Radio (oh and my latest exciting catch of Saudi Airways on 8968khz)

But on the latest arrival in my shack, the XHDATA D808 from Australia, I was tuning around its extremely user-friendly memories when I came across some South African sounding voices on 13330khz. Turned out to be Kenya Airways Ops control in Nairobi selcalling KQ250 en-route to Seychelles and KQ 211 inbound from Mumbai with METARS/weather reports.

So this was on 17th June 2019 at 1755UTC on the XHDATA D808 indoors on its telescopic whip.

The XHDATA is simply superb for a quick check on each memory channel and then a quick tune up and down a few khz of each channel and all without the need to switch between VFO and memory mode which is what I have to do on the Tecsun PL660.

I am going to do a review on this latest radio to come out of China later on, but I have had my eye on it for about a year, since reading about its very well implemented VHF airband, and FM RDS which are both features I knew I would use a lot.

I've also had some great catches the last few evenings on 8879khz with Mumbai radio working lots of aircraft travelling from the Gulf to India. Qatari Airways, Express India, Singapore Airlines..... it's been superb.


Thursday 6 June 2019

Small, passive HF Loop made down under

A while ago a radio listener from Australia contacted me with photos of his passive HF loop whose creation my blog had helped inspire. I thought I'd posted photos on my original page Inductive vs Transformer coupling but I'm forgetful and scatty and had forgotten. It's a far more attractive loop than my own and shows you what a professional finish can be gotten from homebuilt antennas.


I really like this concertined plumbing pipe for small loops. It looks well professional and much better than the thinsulate grey plastic pipe lagging I've tried before. I shall have a scratch around the plumbing suppliers to check it out.

Friday 31 May 2019

Saudia OPS LDOC Jeddah 8968 khz

Thanks to Mike at HF Aero Blog I have just heard my first HF ops frequency for years, apart from Stockholm. Caught Saudia OPS in Jeddah talking in English to SVA806 as it started its descent for Dhaka. So this was 31.May.2019 at 1722UTC.

I miss the written frequency guides of the 1980s and 1990s and also the Airwaves frequency guides from Photoavia Press, and to be honest I have been a bit lost without them. Internet stuff is mostly decades out of date and I haven't found any blogs that are useful for HF frequencies. Sure I know the North Atlantic, South Atlantic, MID, SEA, INO, PAC ATC frequencies. And several military SSB ones for German, French, Portuguese, Spanish and USAF. But my main interest is civilian stuff, and then mostly the OPS/LDOC side of it.

There's a Russian LDOC freq active on 11193 khz I think. Anyone know of anymore???

It can't just be Saudia and Aeroflot who use HF!

I will try and blog EVERYTHING of interest here.


Friday 1 February 2019

Homemade HF magnetic loop for SWL / Receiving Inductive vs Transformer Coupling

fig 1

fig2

fig 3

fig 4
fig 5
I can't believe my last post was almost a year ago! Anyway, I wanted to share a new design skill I have learnt for coupling my small magnetic loops antennas. As those of you who have read my previous posts might know, I have been using these homemade passive tuned loops for years now, as they are consistently the best type of aerial for urban dwellers like myself who can not or don't want to put up elaborate outdoor aerials or ground rods for earthing them. They are easy to make, can be built for less than $10, and are much more enjoyable and satisfying to use than any commercial aerial I've tried.

Up until now, the main 35-40cm receiving loops have been coupled to the radios inductively. This means I have made a second loop from a piece of coaxial cable or insulated wire about 1/5 the diameter, which is then connected to a coaxial feed cable, very close to the main loop but not physically connected to it (this is inductive coupling) and away you go. (see fig 1)

Recently I have decided I want to try to amplify the loop a little, and I have bought a 9-12v low niose amplifier (ready-made), and small variable resistor (to adjust the gain). But in looking at commercial loops like those from PK Loops in Australia, and AOR, I have noticed they do not have these somewhat unsightly secondary loops in their design, and I have wanted to trhy a different coupling method to smarten things up a bit.

I'm not heavily into technical jargon as it overwhelms me and puts me off starting new projects when the instructions full of it. Usually what these articles are saying is very easy and straightforward, but the complicated language lowers my confidence and makes me think it is too technically demanding.
But as I have got older my confidence is improving and if you look around carefully you will come across one or two articles that are easier to understand and ebncourage you to have a bash. Hence my reason for blogging about loop aerials for so long.

Anyway, to cut a long story short, I have ditched the ugly second loop and gone over to transformer coupling. It is way easier and give the finished loop a cleaner, more professional look.

All you need to do is buy a small ferrite ring (toroid). A T130-2 is 1.3inches in diameter and perfect for the job. I bought two from Bowood Electronics for just over £5 incl postage. Personally I would have thought that for receiving only it wouldn't make too much difference what toroid you used, just so long as you can get half a dozen or so turns or wire and your main loop through the centre.

A word about toroid sizes: a T130-2 is 1.3 inches diameter, a T30-2 is 0.3 inches diameter. The first number relates to the diameter in inches. I can't remember the second one, but again for SWL I don't think it matter enormously. You just need a ring of ferrite.

I searched high and low for information about this as I wanted to know how many turns I needed, what type of wire, how the turns should be wound etc etc In the end I got the gist of it, and learned through reading and trial and error that for max efficiency it works best when the turns are evenly spread around the whole circumference of the toroid. I tried two or three and could tell that compared to the inductively coupled loop certain frequencies wouldn't peak up properly. I increased up to 15 and it was worse! Finally, through a long process of trial and error, I found that for my small 1 foot loops I needed 7 turns of wire (I used the blue wire from standard twin-core 5 amp electrical cable).

One end of the wire goes to the coax braid, the other end to the centre core, and then just plug the other end of the coax feed into the radio.

This new form of coupling seems to produce results just as good as the inductively-coupled loops. Better to my ears in fact as there seems to be less noise. Now, if I were to test the SWR, I could'nt guarantee the transfomer coupled loops were any better. They may even be worse. But I'm a SWL not a radio ham, Im not obsessed with measurable figures and standing wave ratios,'and my loops are for receive only, and I have listened to extremely weak sideband signals on the same loop, swapping from one coupling method to the other, and honestly, I couldn't tell any difference.

I MUST STRESS THESE LOOPS ARE FOR RECEIVE ONLY. DO NOT TRANSMIT EVEN QRP SIGNALS ON THEM. THEY ARE NOT DESIGNED FOR THIS. YOU WOULD NEED AN APPROPRIATE CAPACITOR (for QRP work, more widely spaced vanes at least), THE TOROID VALUE MIGHT BE OF MORE IMPORTANCE, AND THE MATERIALS USED MIGHT NEED TO BE TOUGHER TO COPE WITH THE RF POWER YOU WERE TRANSMITTING.

Anyway, that's enough for this afternoon. Let me know if you have any comments, questions, suggestions etc I love hearing from anyone interested. If you have never made any stuff yourself, take my word for it: IT IS TERRIFIC FUN. You'll save hundred of pounds, the finished product can be made to look pretty decent with only easily obtained bits and pieces, and using it will give you a buzz no commercial product ever will.☺

I realise I have not put any construction details for the loop so I am attaching a png from Mike at Merseyradar. co.uk who kindly did a diagram for me.

The main receiving loop is 35cm diameter and has two windings with a switch to select whether you choose one or both of them. It is tuned with a small variable capacitor that I bought on eBay and the two gangs of the capacitor have been joined together to give what I think is 760 PF capacitance but it maybe 1000pf as I'm afraid I bought it years ago and don't have the purchase details anymore.

If you were to use only a single loop winding and omit the switch then you would get a tuning range of approximately 5 to 30 mHz. But with solar activity so low over recent years I really needed it to tune down to the shanwick Night-Time frequencies in the nighttime frequencies in the 2, 3 and 4 MHz band. Oh and I also like listening to the maritime calling frequency of 2182 kilohertz, so 2 MHz seems an appropriate place to stop for my requirements. 

I also want to update you about the plans to amplify the loop as these have unfortunately been a huge waste of time! Hours of work and waiting for components to arrive from China just resulted in a whole lot of noise being pumped into the system and the whole loop became completely unusable. I am slowly coming to the conclusion that if you are turning to a loop because an outdoor antenna will be too noisy than the last thing you want is amplification. 

It may be different for a professionally constructed loop like those from aor or PK in Australia, but I strongly suspect after years of having tinkered around with aerials for shortwave listening that any performance improvement as a result of amplification would be marginal at best. So my advice would be to forget about any expensive commercial product and have a bash at building one of your own. It's so much more rewarding in every way. 

And if you do have any stories to share about your experiences with loop designs please feel free to comment.